


Maternity Mod of a Comfy Cowl Hoodie
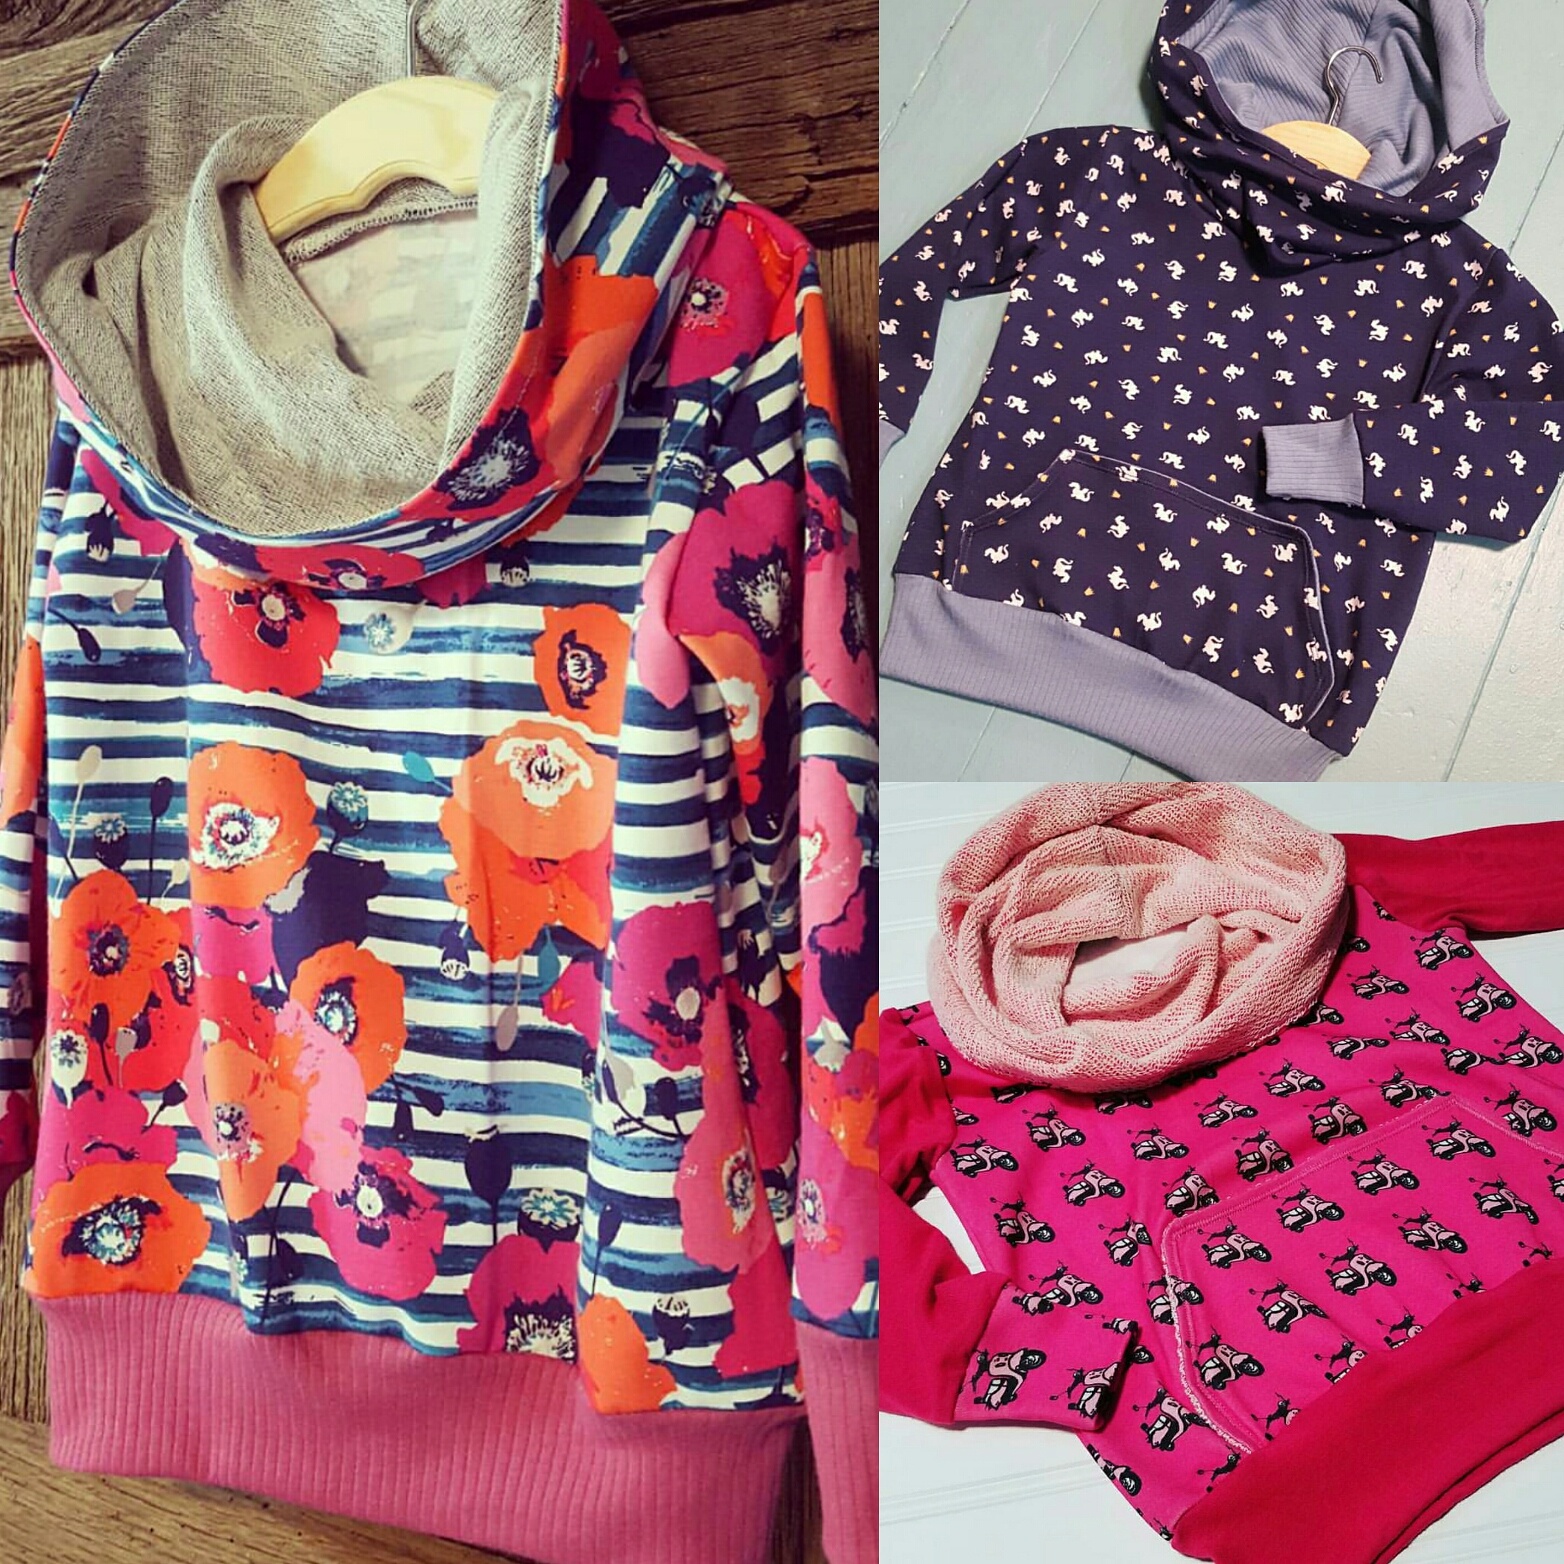
The stunning over-sized combination cowl hood on Mummykins & Me's Comfy Cowl Hoodie makes it my most-requested make. The pattern comes in a huge range of sizes for kids starting at 0-3 months through the women's up to 5XL! I've sewn many different sizes in a range of fabrics from french terry, interlock, ponte, and double brushed poly. When I got a request from a first time mama to be, I was excited to make her a maternity version. I'm detailing the 2 simple adjustments I made in this post. (I also omitted the kangaroo pocket which would sit under a baby bump.)
The general approach to this maternity mod is to lengthen the front bodice. At the same time, I took out the curve of the side seam by connecting the top and bottom points of the bodice with a straight line. But! I must apologize that my pictures don't show that. They show the pattern cut along the original curve, so keep that in mind. Sew anyway, to add length to the front bodice, cut it along the shorten/lengthen line and spread the pieces apart. I like to add 6 inches. I've tried adding more (11" inches once on a different pattern) to amp up the ruching effect, but my top ended up being much too roomy up front.

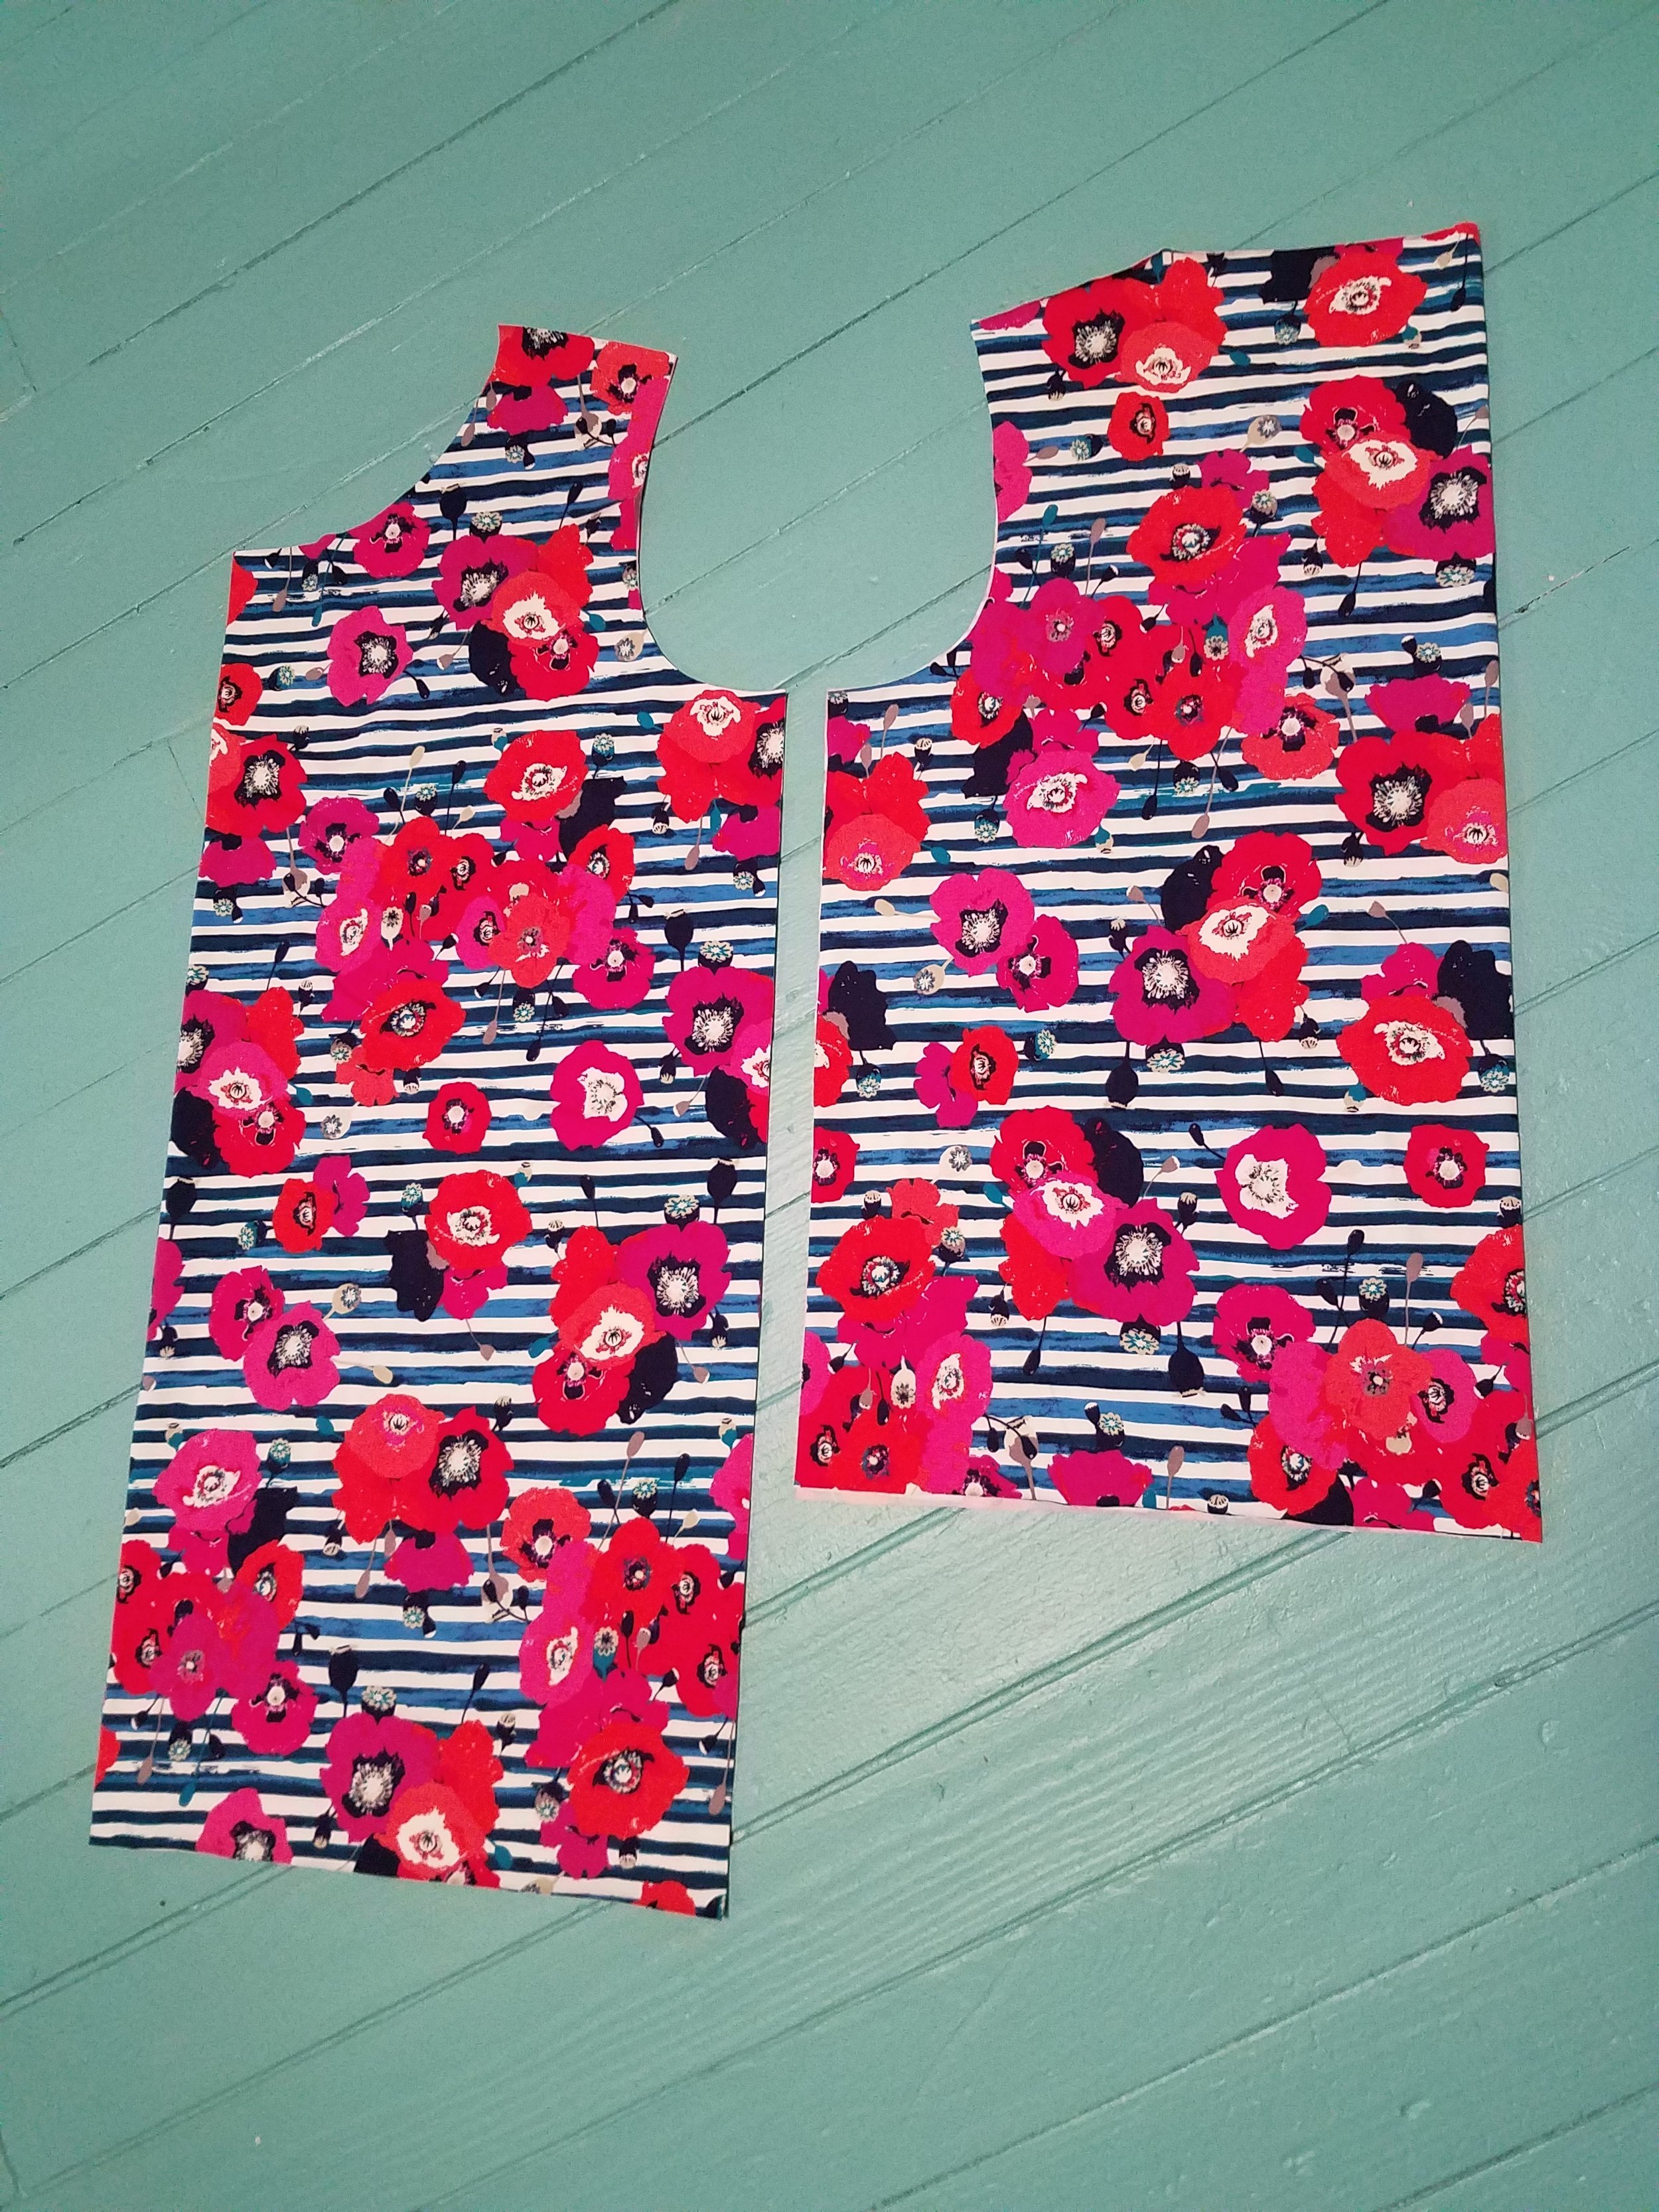
Cut along the shorten/lengthen line and separate the pieces, adding 6 inches of space between them.
I taped the pieces to another sheet of paper, 6" apart to create a new front bodice pattern piece before cutting the fabric. My cut fabric is shown below. The front (on the left) and back bodice pieces are folded and lying next to each other with the side seams lined up in the center.
Now the front bodice needs to be gathered until its side seam is the same length as the back side seam. I ran a basting stitch from a few inches under the bottom of the armscye to the bottom of the side seam. The next picture shows pins (highlighted with the arrow) marking where I started basting.
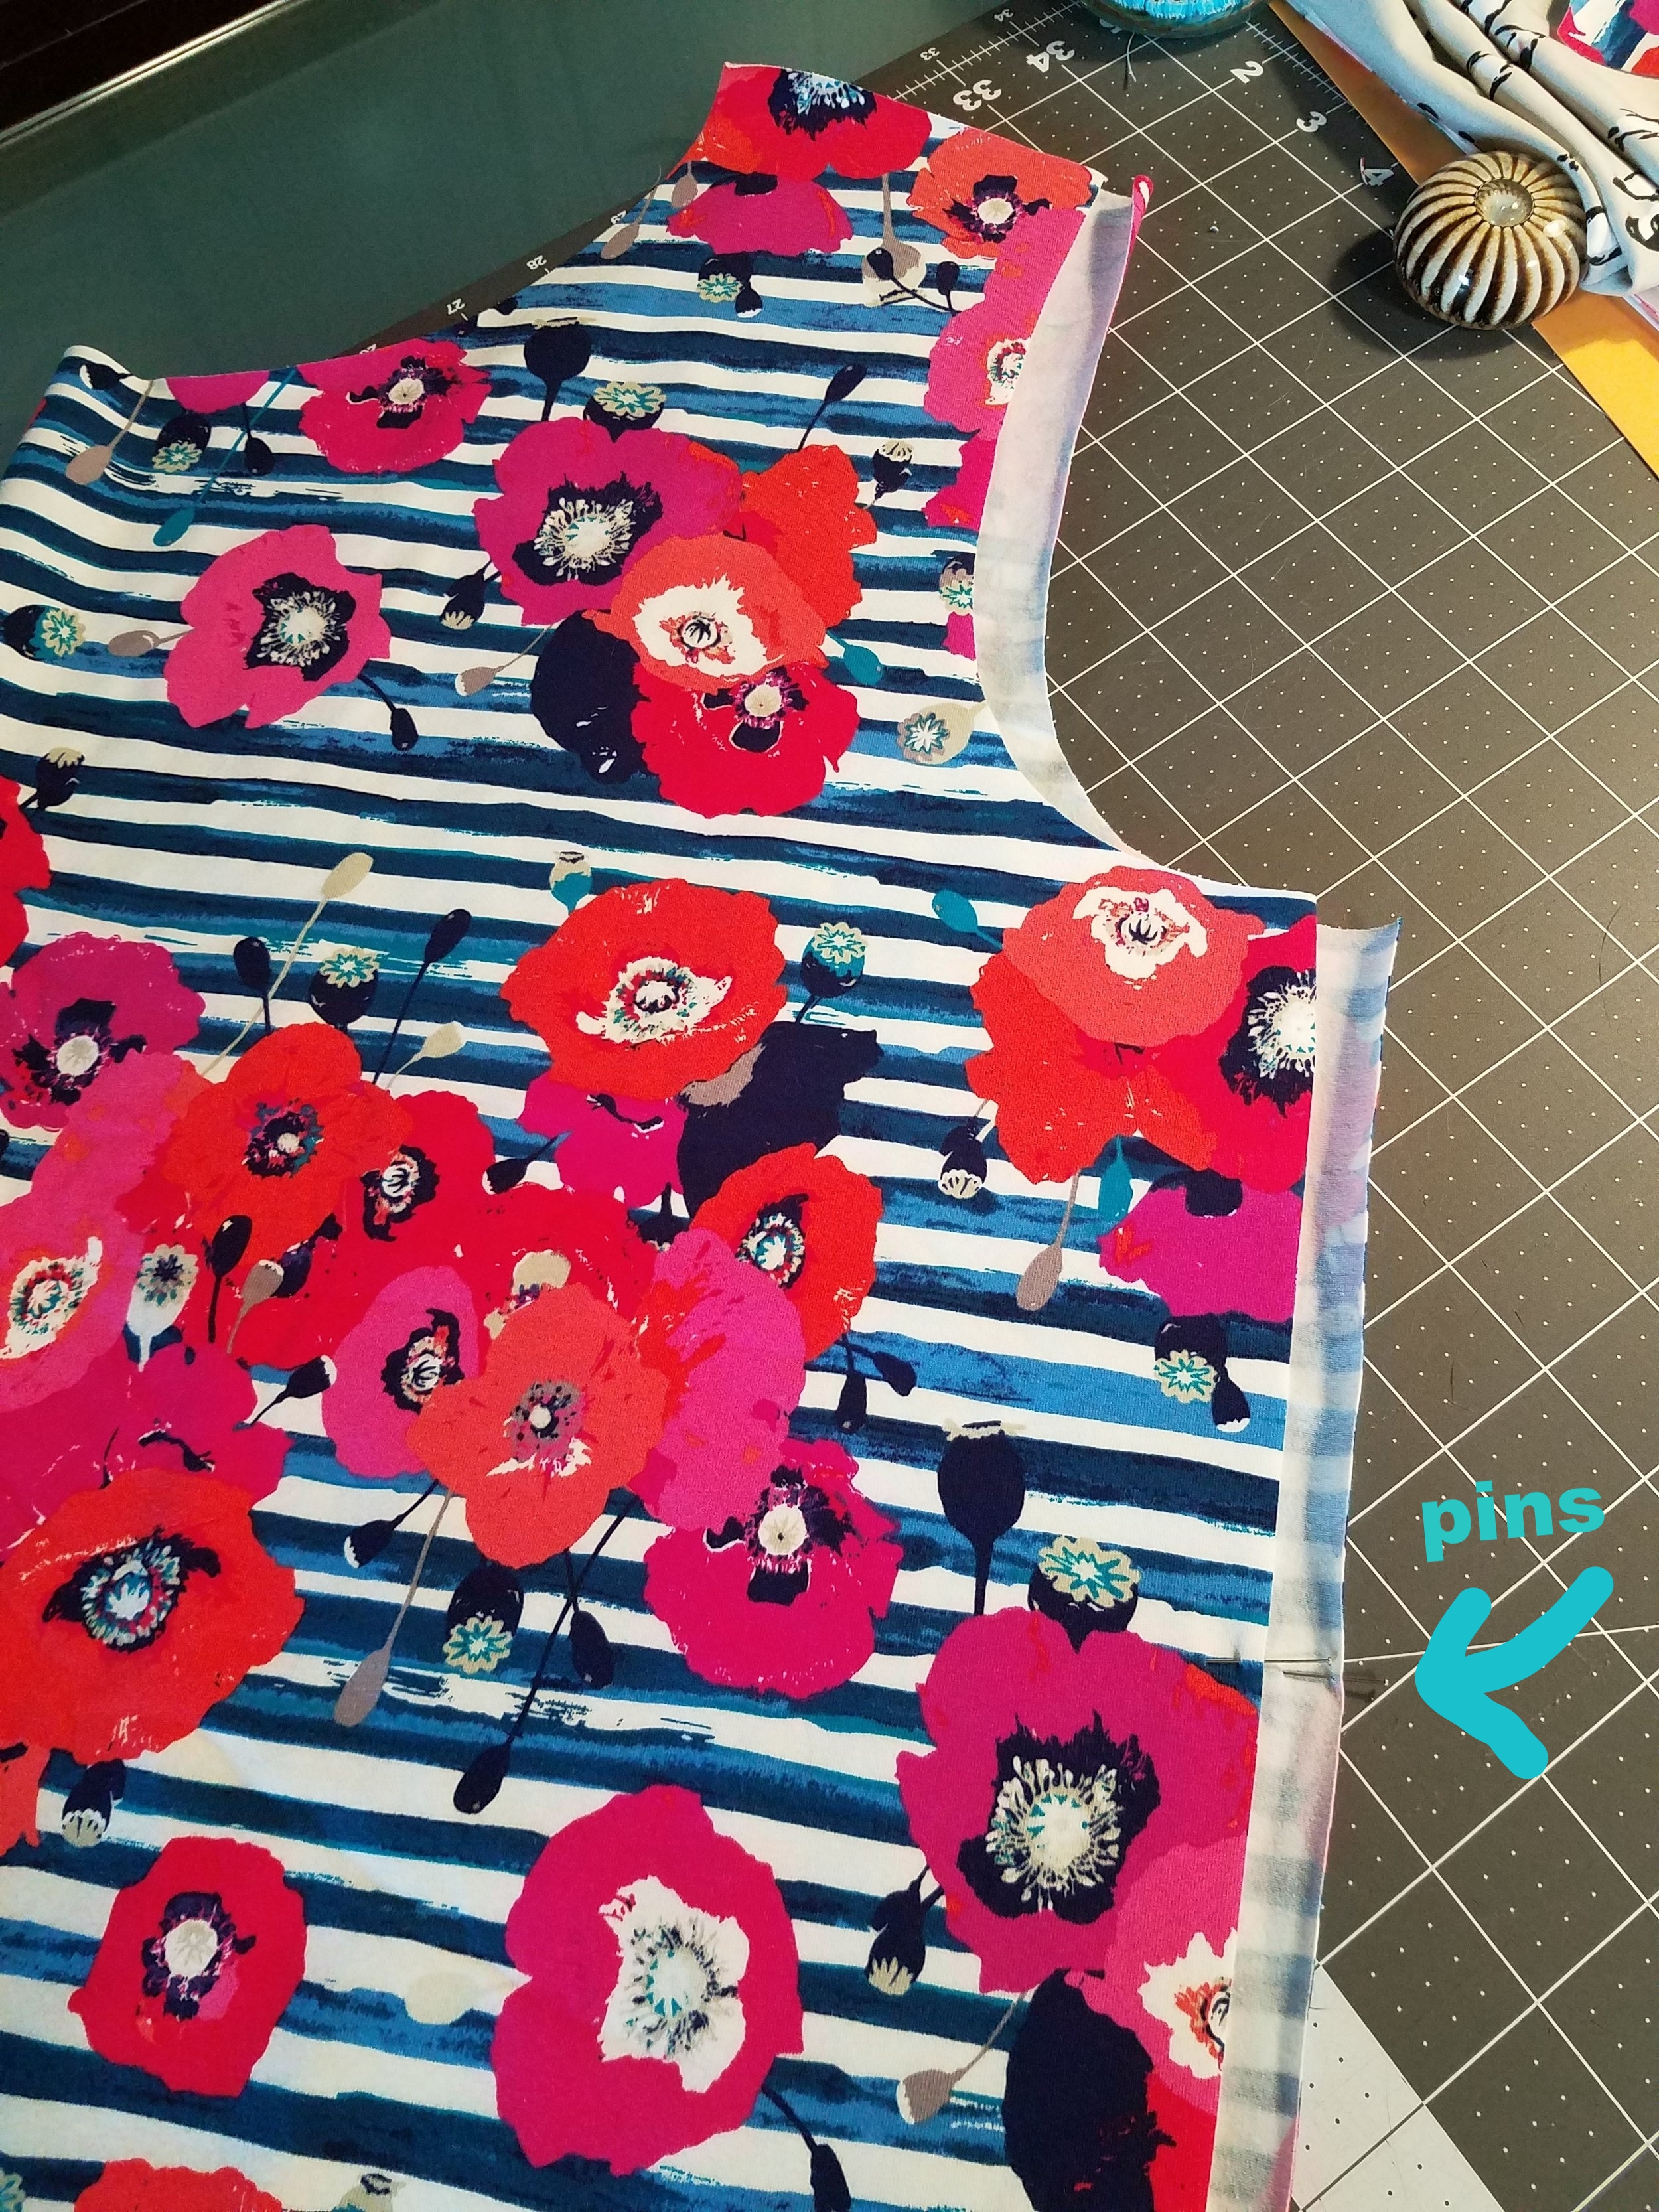
Front bodice pinned to mark where to start basting
After setting the sleeves, close the side seams. The next pic shows all the gorgeous gathers on the front bodice evenly spaced and pinned right side together to the back bodice, ready to be joined.

Here I go again apologizing, but that luscious Art Gallery striped fabric obscures the ruching a bit. Sorry! Notice the extra volume created though. That's where the bump goes. ;)

Finish the garment as per the regular assmebly instructions, adding the bands and cowl hoodie.

Here's where I'd love to share plenty of modeled pictures. Bad news- the mama delivered her baby rather prematurely (around 30 weeks). GOOD NEWS- EVERYONE IS DOING FINE and maybe I'll get to sew some itsy bitsy clothes for the little guy soon.

