


Orchid Wrap Top
I try to live my life with no regrets, but I tell you what. I totally missed the boat in not signing up to test Chalk & Notch’s Orchid Midi. Part of my reasoning was that I don’t wear dresses. And the other piece was that I sincerely doubted I could figure out the fit of a wrap bodice.
Well fast forward a few weeks and I’m planning outfits for an impromptu family photo session. The ever opinionated (in the best way) and stylish Gwyn suggested a wrap-style top and I instantly knew I’d have to buy the Orchid Midi and adapt it to get the look I now coveted.
I purchased the pattern from UpCraft Club with my 20% membership discount while it was on sale, so I only spent about $9.50. A great deal, really!

I had been eyeing these wrap tops from Madewell for months. In particular, I liked the sleeves and banded bottom. The Orchid really has nearly all the exact same style lines.

I actually did contemplate making a dress for a little while as I was prepping the pattern. I was concerned however that I wouldn’t have enough yardage as the fabric requirements call for over 4 yards. At any rate, I pulled some scrumptious Pat Bravo Art Gallery rayon from my stash and cut into it without making a muslin.


After scouring the #orchidmidi tag on IG and chatting with a few sewists who had made or tested the Orchid, I decided it was a good approach to lengthen the bodice. Since I was wanting the top to be longer, falling below my natural waist, I lengthened the bodice at the bottom of the pattern, not at the lengthen/shorten line. I went with a somewhat arbitrary 2 inches.

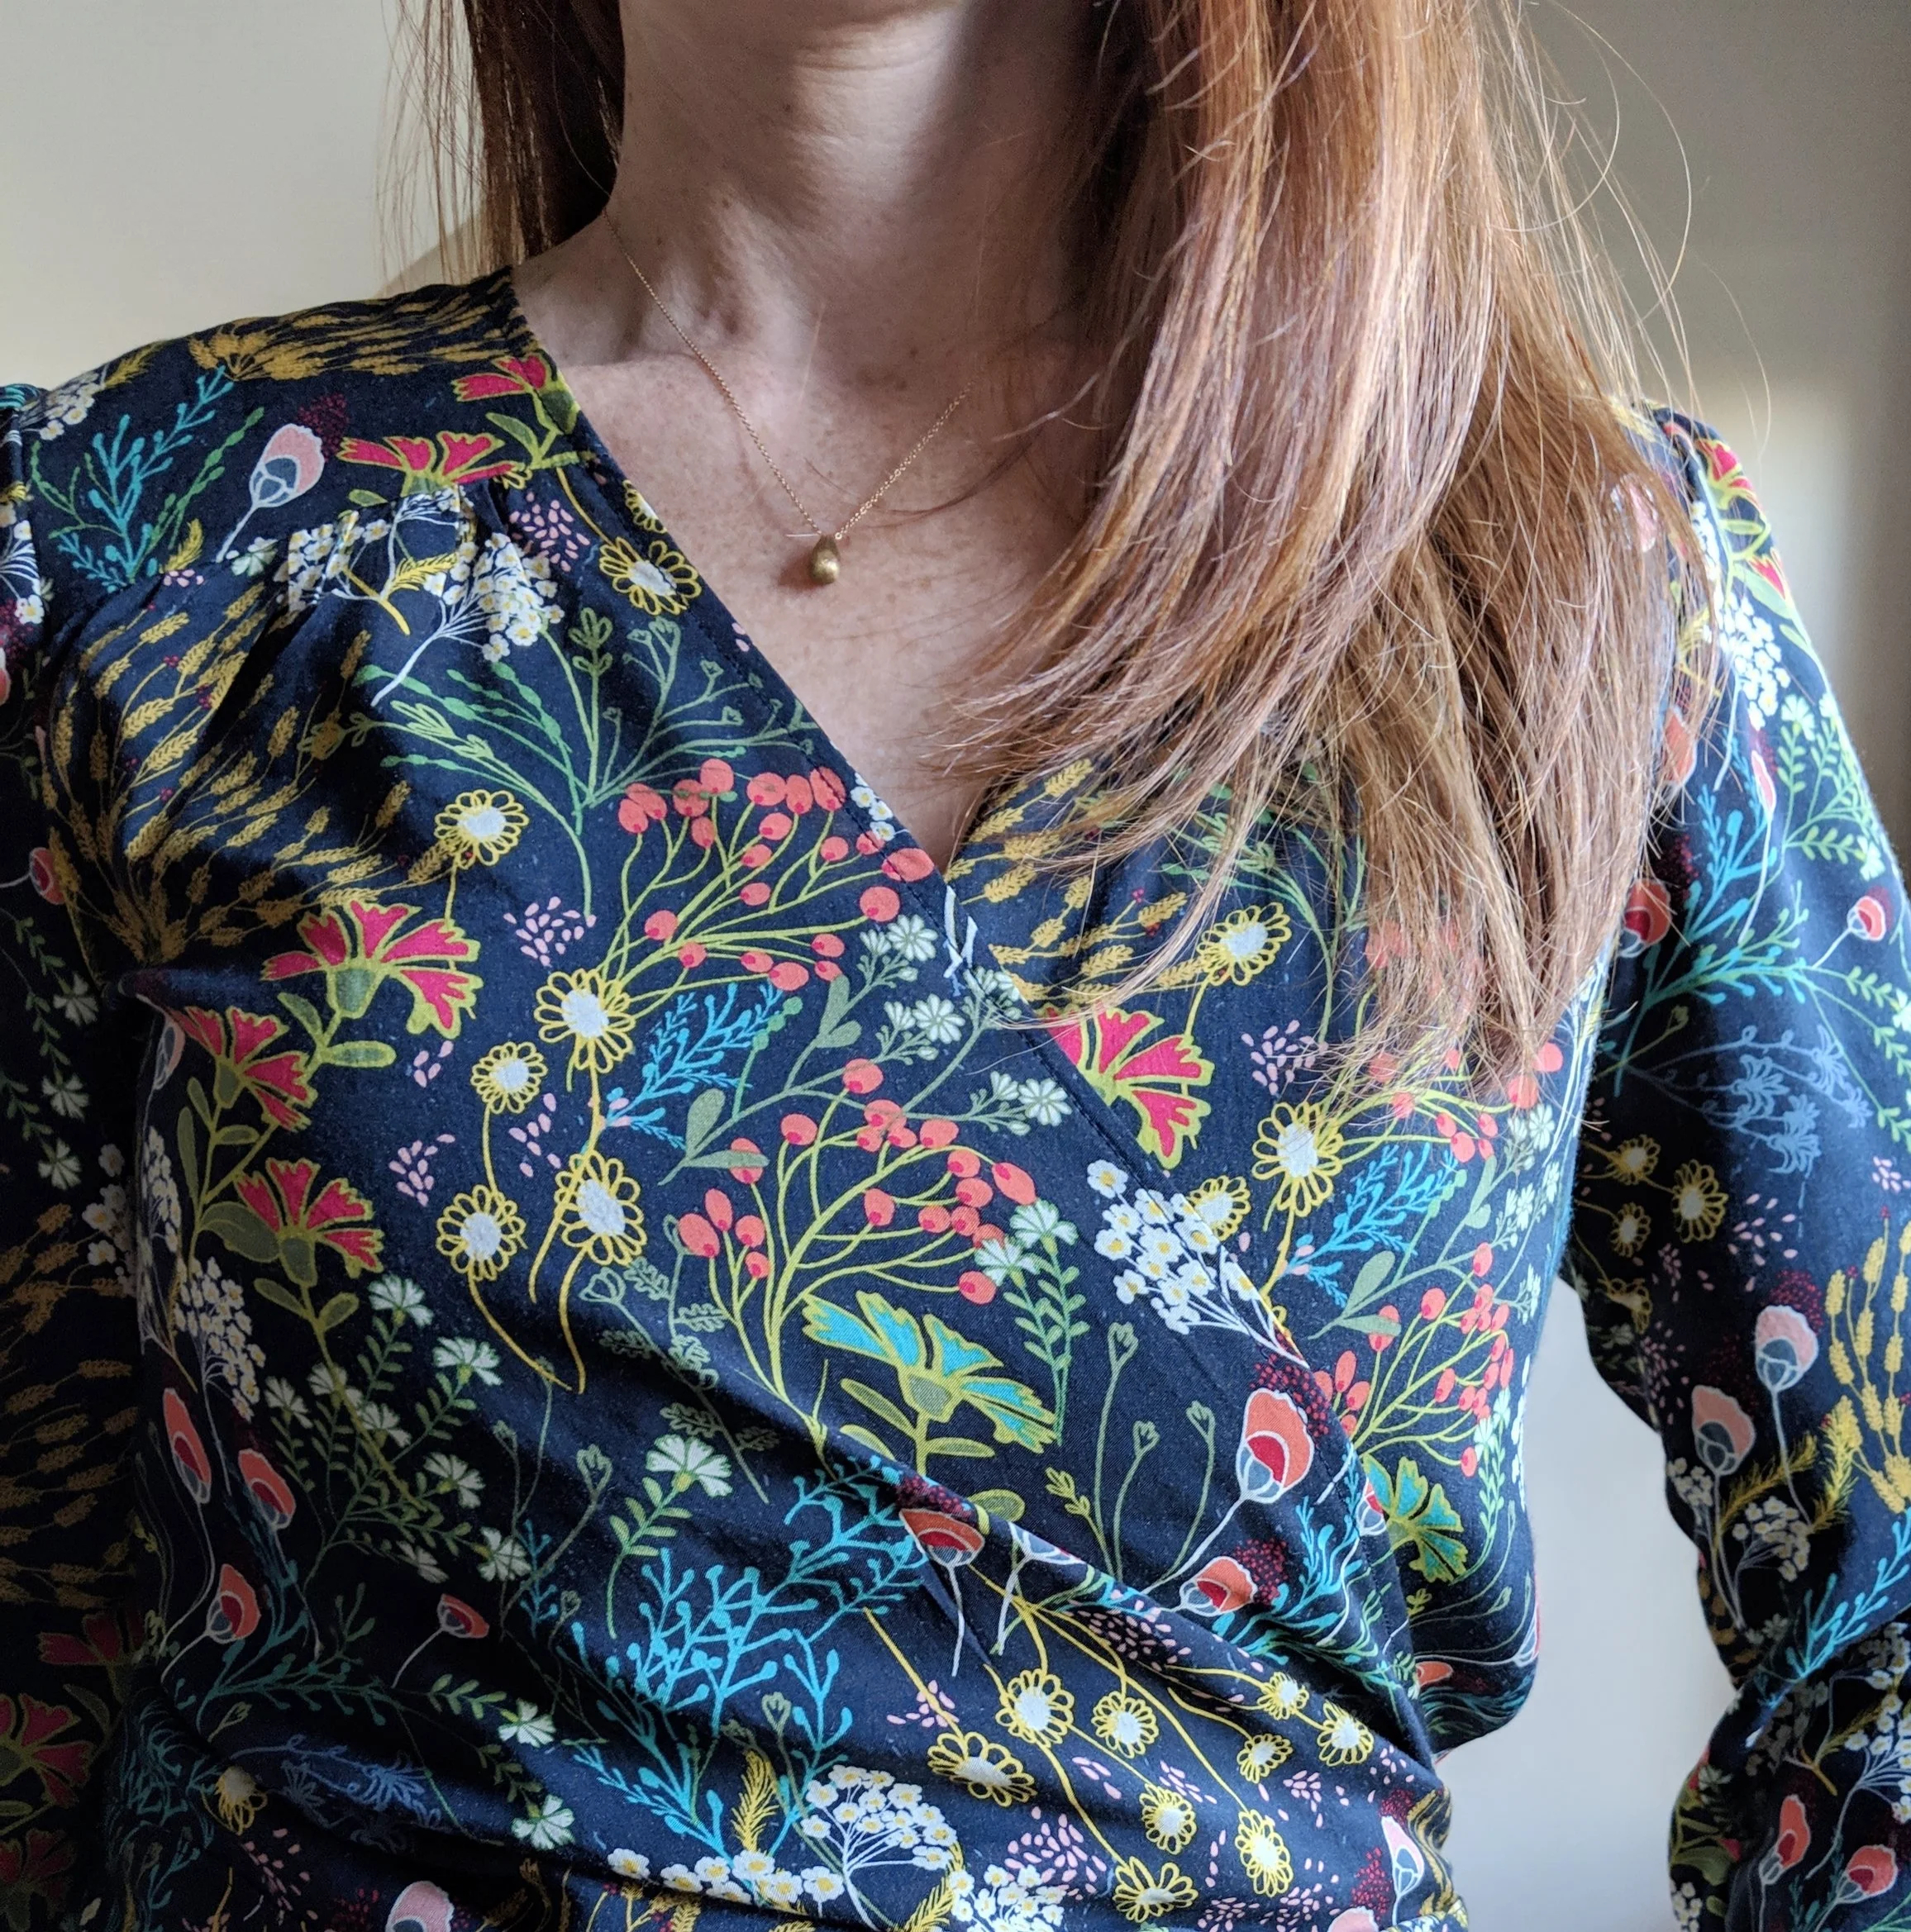
I used some cotton lawn for the bias binding of the front neckline. I like that cotton is more stable than rayon and therefore much easier to work with. I also decided to apply the bias in the “French” fashion for its simplicity.
I planned to skip the elastic in the sleeve hem and add a simple cuff for the sleeve to gather into to match my inspiration. I cut the sleeves the designed (full) length, just taking the slight hem taper out.


The cuff I created by figuring out the smallest band my hand could slip through, approximately 8” in circumference. I cut 2 pairs of rectangles (4 pieces) measuring 2 1/4” x 8 3/4”. I simply gathered the sleeve at the hem into these simple cuff bands. (I noticed after the fact that my inspiration’s sleeve cuffs button. This style would also be very simple to recreate.)

Now I couldn’t quite wrap my brain around (pun not intended) how the Madewell wrap portions are constructed. I don’t even have any wrap tops in my pattern library nor closet to consult, so I finished the wrap in the simplest way I could conceive. I simply added a long tie to the hem with a short tail (mine is about 8” long) on one side and a long tail on the other that wraps behind and ties to the shorter tail. For my size, it worked out that 2 widths of fabric (about 100” long) x 5” high was just perfect. I attached one long side of the tie to the inside of the blouse. I closed the tie ends, sewing with right sides together from the short ends to meet the blouse, turned these out, then closed the hem band by top stitching it to right side of the blouse.

closing the tie ends
That’s it!

I mean. ALL THE HEARTS EYES, right? This fabric and this pattern were made for each other.

Ginger jeans
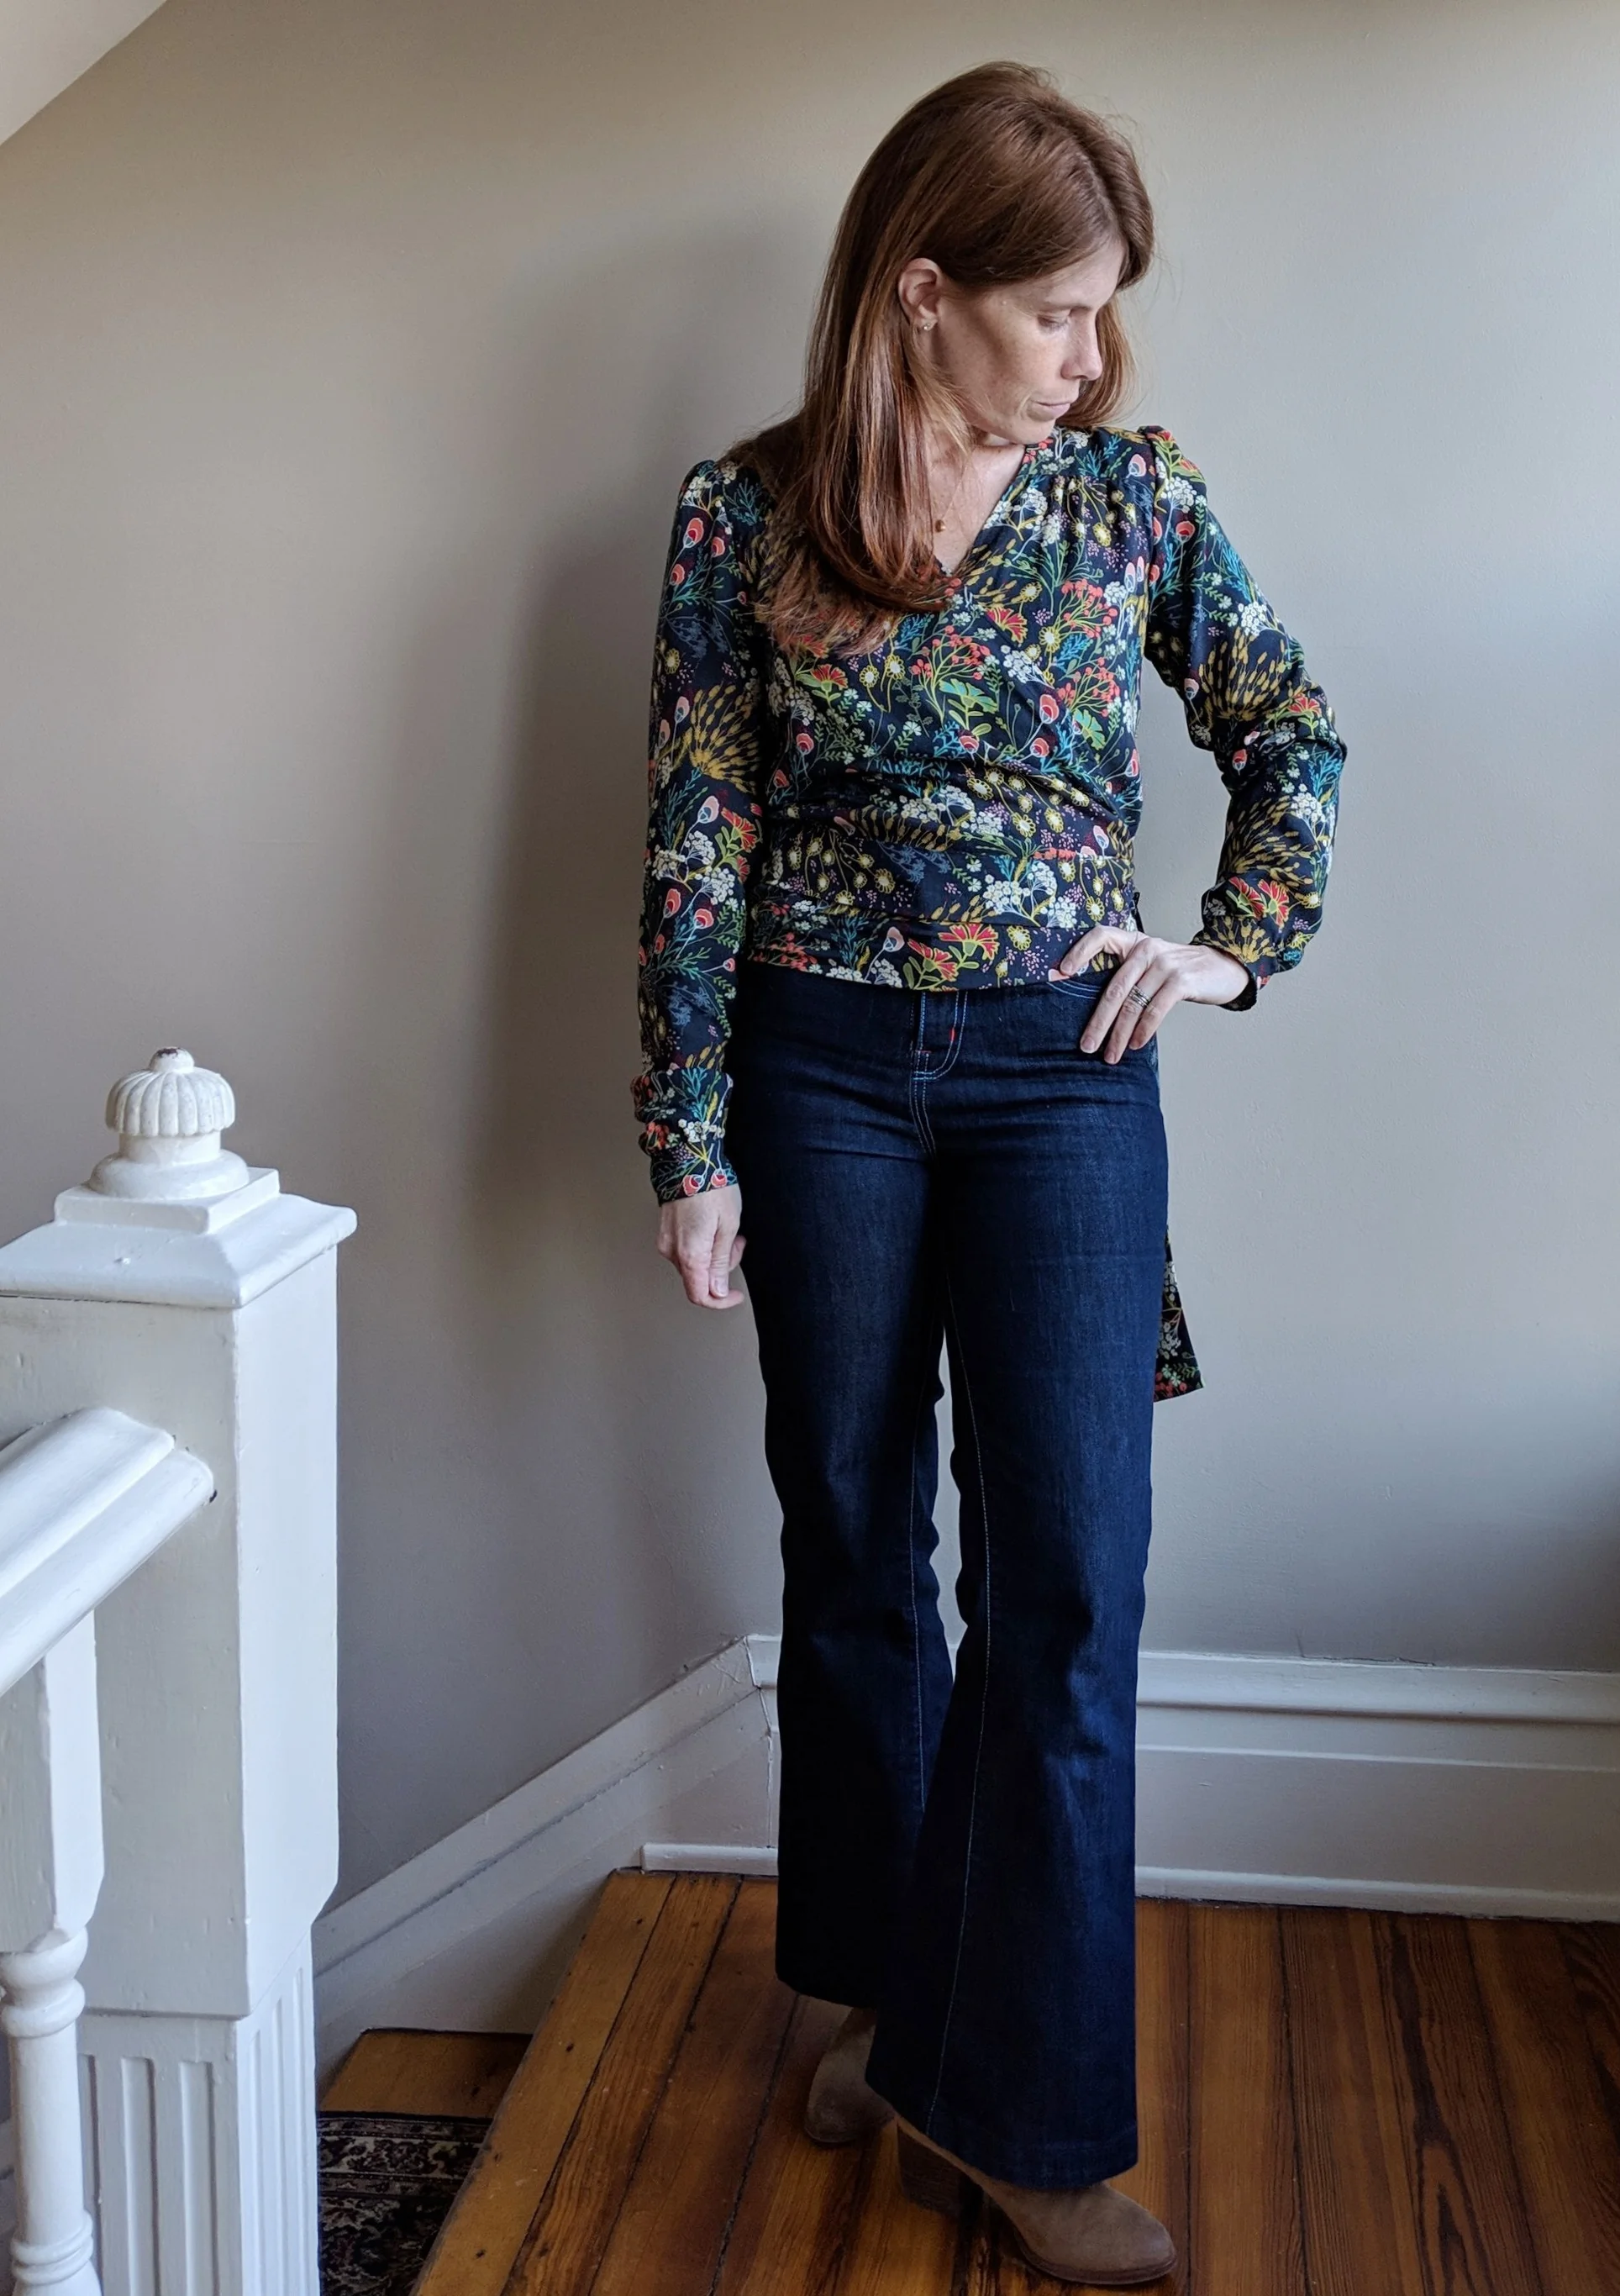
I chose to wear my Orchid wrap with my Birkin Flares (the first jeans I ever made!) and some light brown suede booties. LOVE THE FALL VIBE.
With the freedom of a free hem on this wrap top, I’m able to get tie it as loosely or tightly as I desire. I actually don’t find that I need to tack the fabric at the cross over or add any hidden snaps. I understand wraps are meant to cross under the bust, but that’s just not how I want to wear it. (Mostly because I don’t want to figure out what sort of bra situation that requires. Nope. I’m happiest in my simple wireless bralettes from Target.)

I would likely make a few adjustments in sewing this top again. Really this one is a muslin. First, I would lengthen the bodice another inch and possibly widen the back bodice to match my inspiration more closely. I would also like a tad more room in the armscye. I think I would lower it a half inch as it feels high, especially in the back. I would widen the sleeve slightly, either doing a full bicep adjustment or since the sleeve cap has so much gathering, just widen the whole sleeve. I compared this sleeve to a tried and true blouse with a set in sleeve and the Orchid sleeve is an inch narrower at the widest point. I might also consider adding a buttonhole for the long wrap tie to feed through.

I can’t wait to see how our family photos by Andi Roberts turned out. I imagine I’ll be sharing those soon.
