


While the Hey June Key Largo Top released in 2017, I'm just catching up and sewing it for this summer. This woven top pattern features ties at the front hem which are made possible by the center front seam. This seam also gives way to added interest and drape as it is suggested you cut the front pieces on the bias. (You don't have to, though. The pattern also steps you through cutting the front on the fold.)
I sewed my first Key Largo in an ombre stitched chambray and instantly knew it was a pattern I would sew again.


I pulled some cotton lawn from my stash for my next version. I chose a straight from hem (cut on the fold) and modified the sleeves so they would have the ties. It's double the fun, huh?


After sharing, I had a few requests for the instructions, which I'm more than happy to finally share. The pattern was designed with a hem facing to finish the ties. You could still use this approach for the sleeves, but I chose to simply line them.


Creating your new sleeve pattern pieces really is as simple as shown in the 3 pics above.
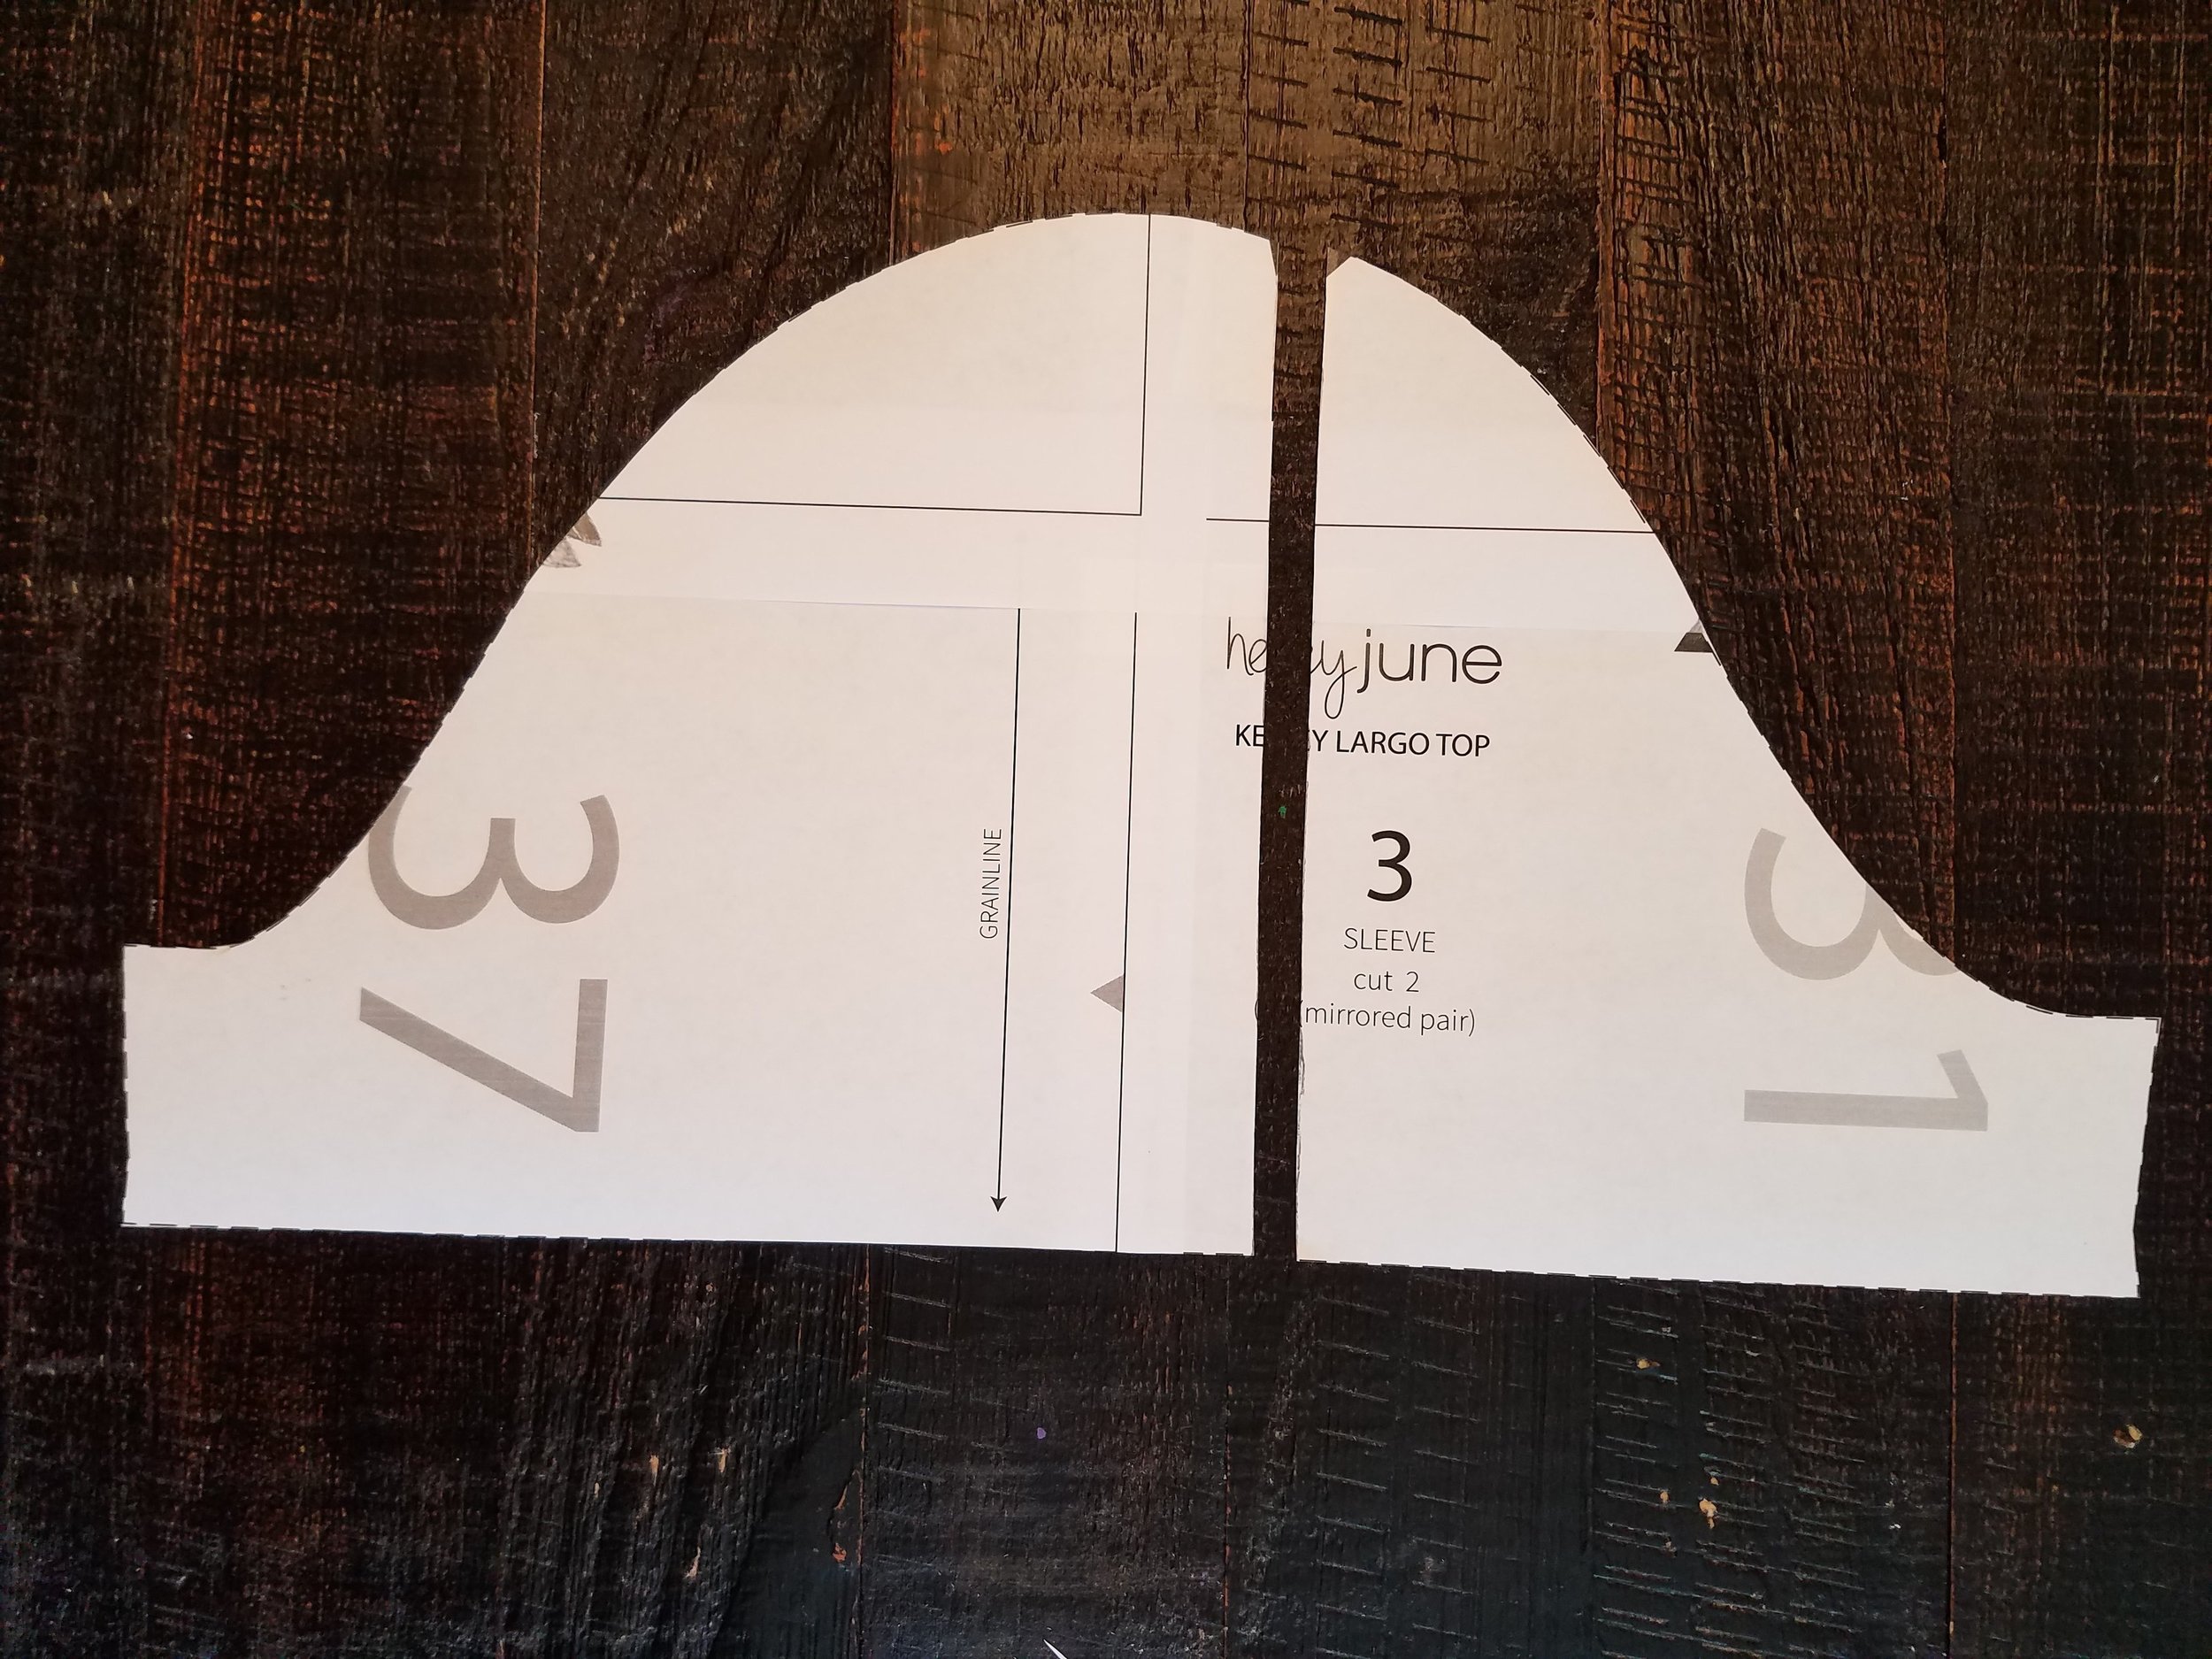
- Print or trace a new sleeve pattern piece. Note the location of the notch for the shoulder seam (pencil points to it).
- Slice your sleeve pattern piece into 2 with a line perpendicular to the hem and in line with the shoulder seam notch. Mark your pieces front (right, with single notch) and back (left, with double notch). You need to add 3/8" seam allowance to both pieces along the cut line.
- Mash the tie pieces to the front and back sleeve pieces. (The ties are unaltered from the original pattern and have seam allowance included.) At this point, you can trace new master pattern pieces for the sleeves with ties or just tape it all together (I'm of the latter camp, but I haven't explicitley shown this step in a photo.)
When you cut your fabric, you'll need to cut 2 mirrored pairs of each of the sleeve pieces in the main fabric and a lining fabric. Sew your front sleeve main and lining sets right sides together along the seams depicted in the next photo and repeat for the back sleeve sets. (CLEARLY I AM A PHOTO EDITING GENIUS. #yourewlecome) Turn these pieces out and press.

This is the trickiest part to describe, but I think you can follow. Take each lined sleeve set; front & back left and front & back right. You will be sewing the front and back sleeve pieces with right sides together, stitching in the ditch between the main and lining seam you just closed. (I actually initially made these tie sleeves differently, but I like the way I'm describing here better.) The length of this seam depends on your preference. It can be short (about an inch) for a widely split sleeve or longer (about 3 inches) for a more closed look.
You have 2 options for attaching your sleeves. Set them flat and close the side seam as per the usual directions. Alternatively, you can close the top's side seam and the sleeves' side seams separately and then set the sleeves in the round. This second option has the cleanest finish with a lined sleeve. Sewist's choice, of course. I tend to prefer flat construction. Either way, match the front and back sleeve seam with the shoulder seam.
That's all, folks! I'm off to make another modified Key Largo with the ties at one side seam next. I thought Erin (@sewbon) had beat me to it with this red top in that style she shared on insta...

392 Likes, 21 Comments - Erin (@sewbon) on Instagram: "Took Bertie, my new photo shoot prop, out for a test shoot tonight. 😂🐶📷 Verdict: he's ridiculously..."
...but she didn't mention any details about her top. Ahem. Draw your gaze to her shirt. Don't get distracted by the adorable puppy, eh!? (Yeah, I've decided her top is knit, but anyway!)
Fine. Go follow Bertie. Then back to sewing, ok?
